


If you’re creating a website, you’ll probably want to test it before hosting it on the internet to ensure it works properly.
It is recommended to test your website on the same web server that it will be hosted on when it goes live. This will ensure that your website behaves the same way in production as it does locally. Luckily, many web servers are simple to install and use on your personal computer.
On a Windows PC, you can use Internet Information Services (IIS). IIS comes free with Windows, so all you need to do is enable and configure it to view your website.
What is IIS?
IIS stands for Internet information service, it is a web server that you can use to host static or dynamic websites. A web server works by serving content—such as HTML, JavaScript, or media files—to a user’s browser, in response to a request.
Some frameworks such as Angular already have basic built-in web servers. These will serve your website to preview and test locally, using the localhost domain.
How to install or enable IIS?
You can download Windows Server and install it on a virtual machine. Additionally, you can launch Windows Server on any cloud platform(AWS, GCP).
Enabling IIS:-
- Search for Turn Windows Features On and Off using the search bar:

- Choose the option for Internet Information Services.
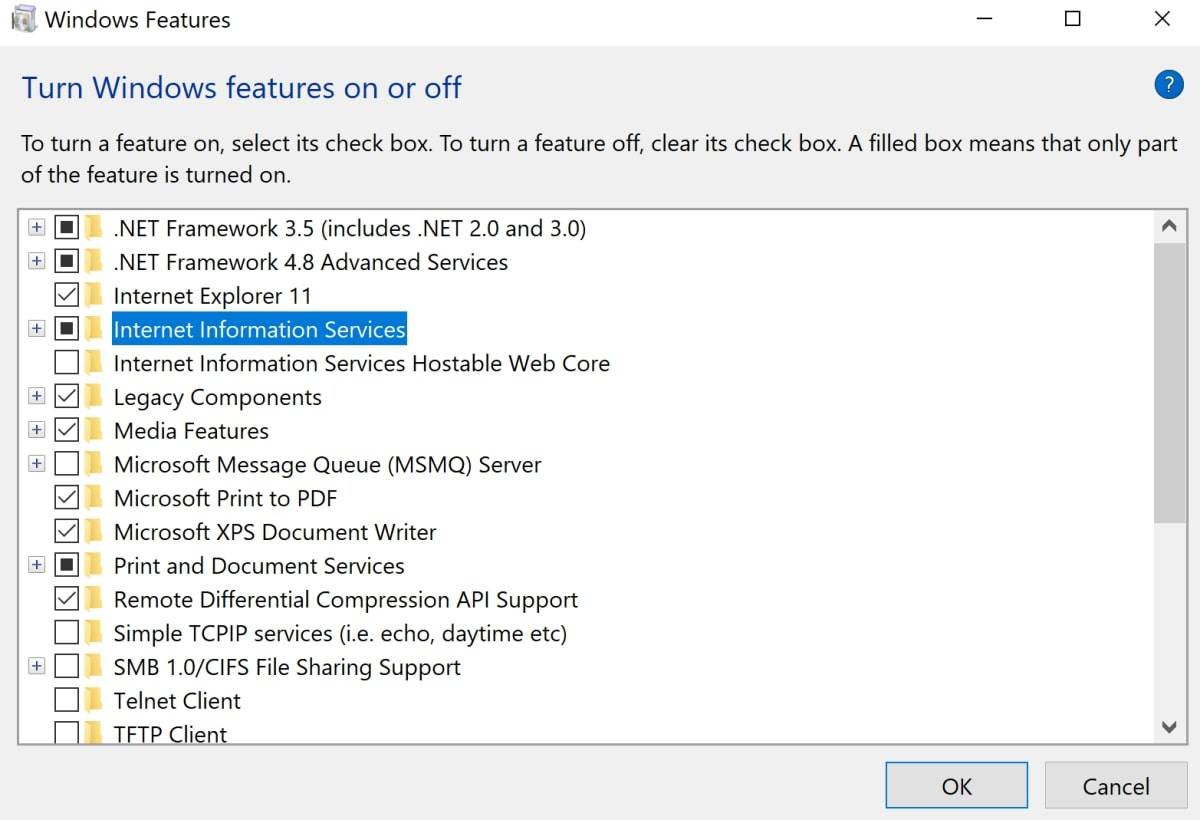
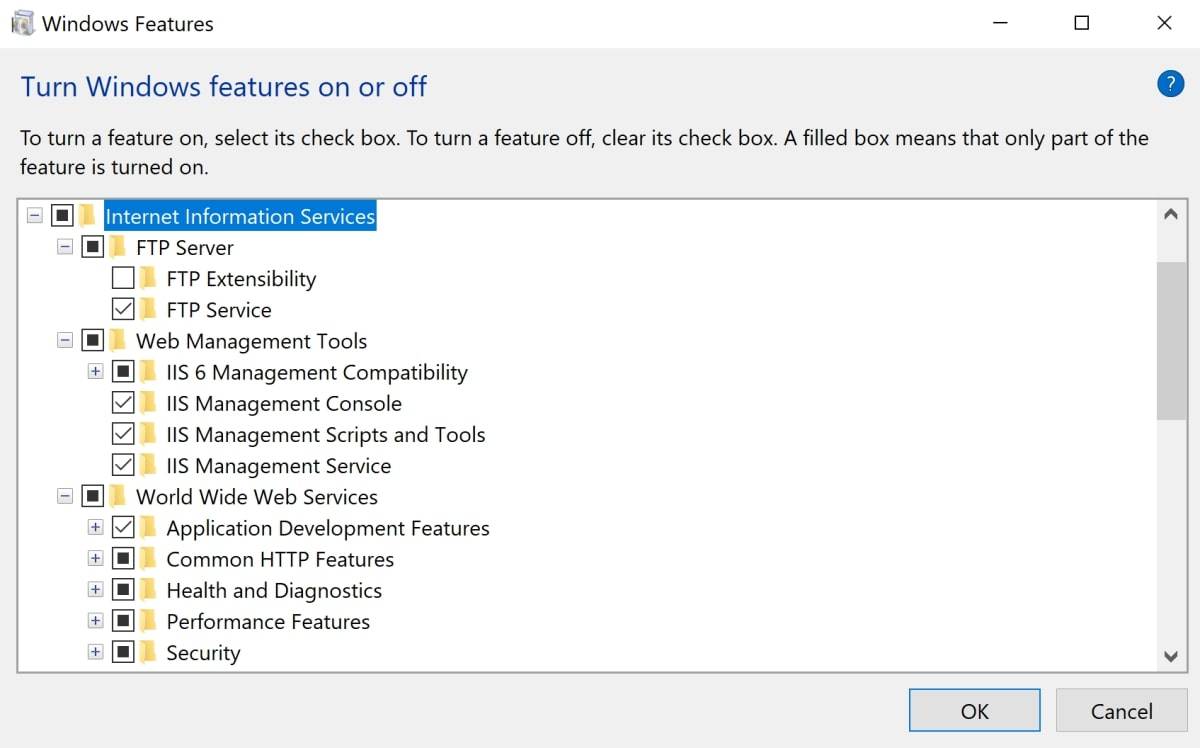
- Open Internet Information Services and choose all the necessary sub-features.
- Press OK and allow Windows to implement the modifications.
In the future, if you decide to remove or change any features, Windows may ask you to restart your computer before applying them.
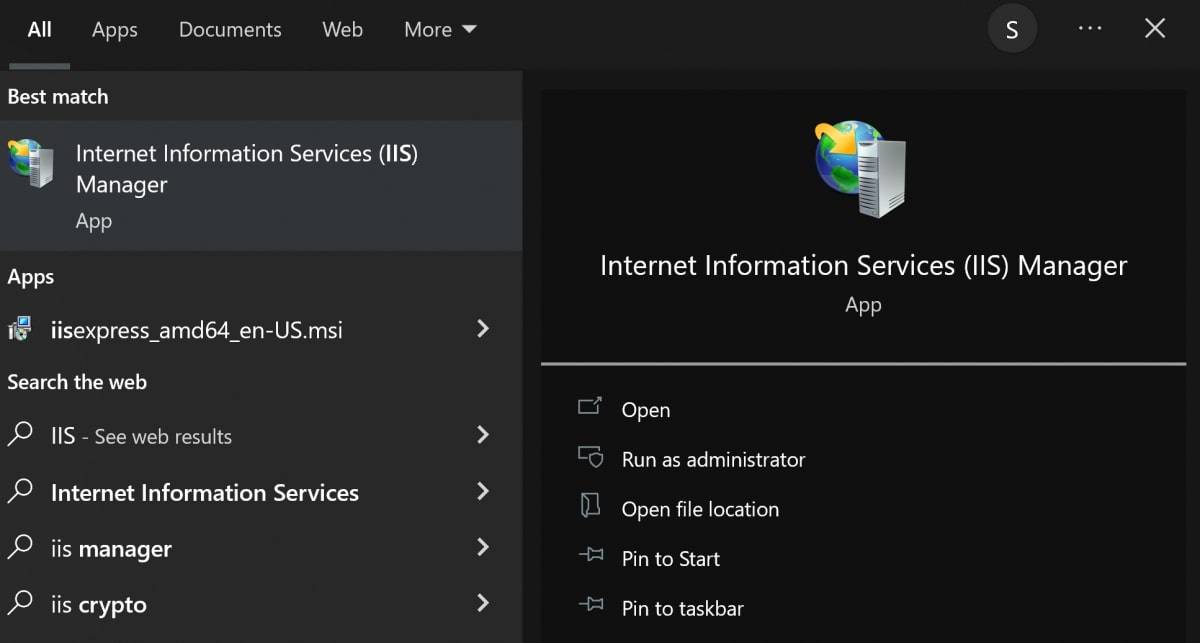
- Search for the IIS application, which will now be available to open on your Windows computer:
- Access the IIS console by opening IIS.
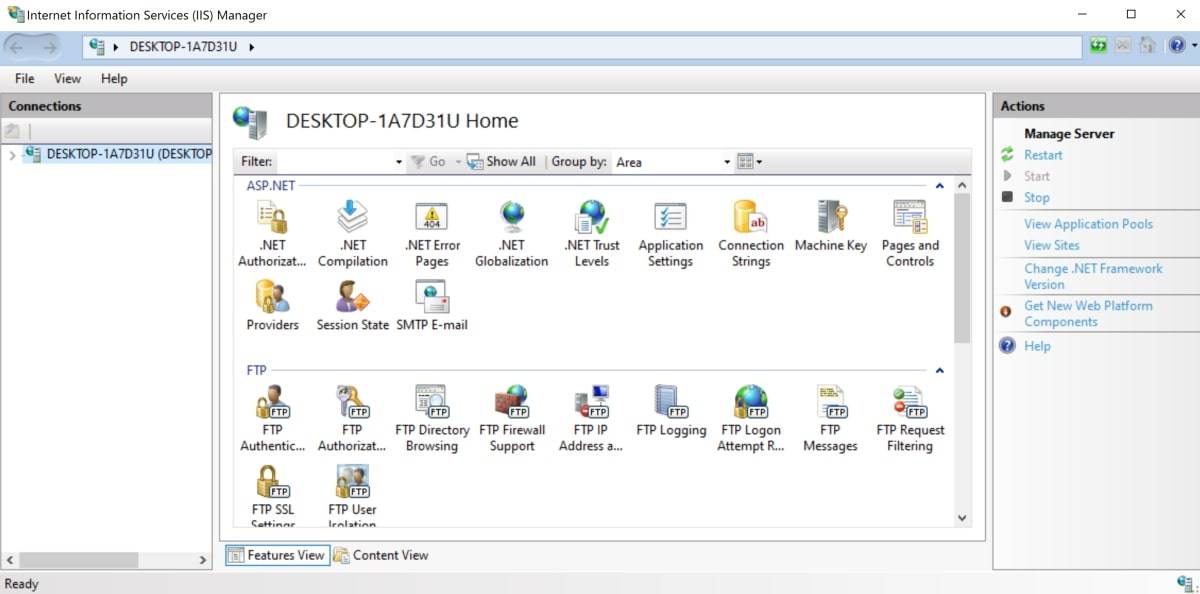
The IIS dashboard is what you are currently viewing.
How to Create a Simple Website?
- Create a new file called index.html. Add the following content to the file:
<!DOCTYPE html>
<html>
<head>
<title>Page title</title>
<style>
    body{
        background-color: lightblue;
        font family: Arial, sans-serif;
        margin: 0;
        padding: 0;
    }
    .container{
        text-align: center;
        margin-top: 50px;
    }
    h1{
        color: #333;
        font-size: 28;
    }
    p{
        color: #666;
        font-size: 16px;
    }
</style>
</head>
<body>
    <div class="container">
        <h1>Welcome to (IAM)OPS</h1>
        <p>DevOps for Startups</p>
    </div>
</body>
</html>
Make a folder named MyTestWebsite in the C:\inetpub\wwwroot directory on your computer. This folder is designated for keeping the web pages and other materials that form your website.
Copy or move the index.html files into the new MyTestWebsite folder.

How to Add and Configure Your Website Using IIS?
To host your website using IIS, create a new website and point it to your content.
In the left-hand sidebar of the IIS console, right-click on the Sites directory.
From the options in the menu, select Add Website, to open the configuration window:
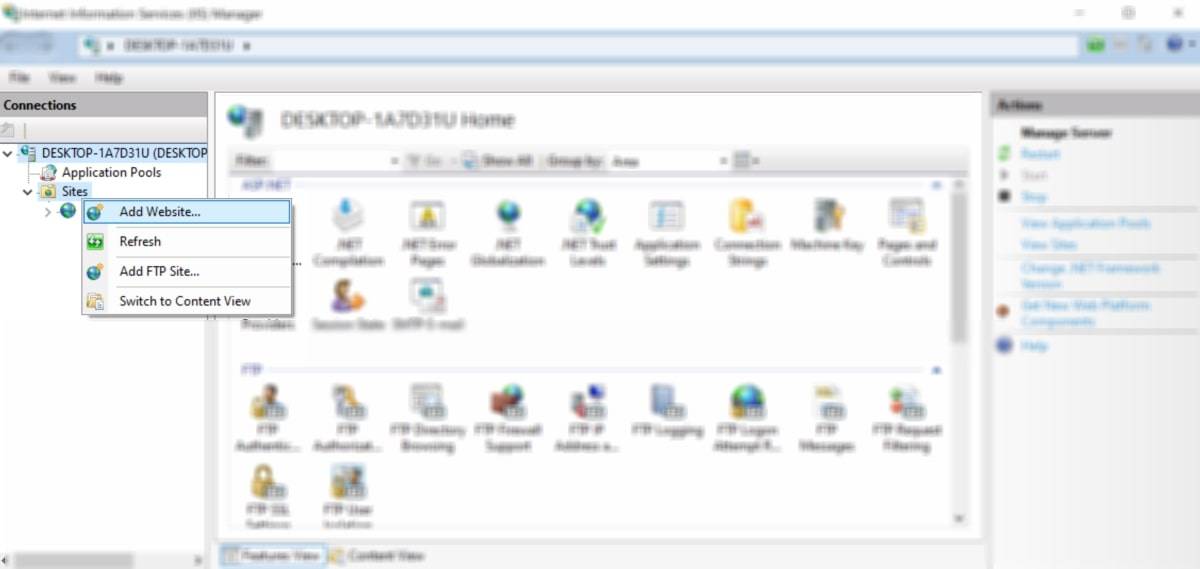
- Add a name to the Site name, such as "My Test Website". IIS will automatically fill in the field for the Application pool.
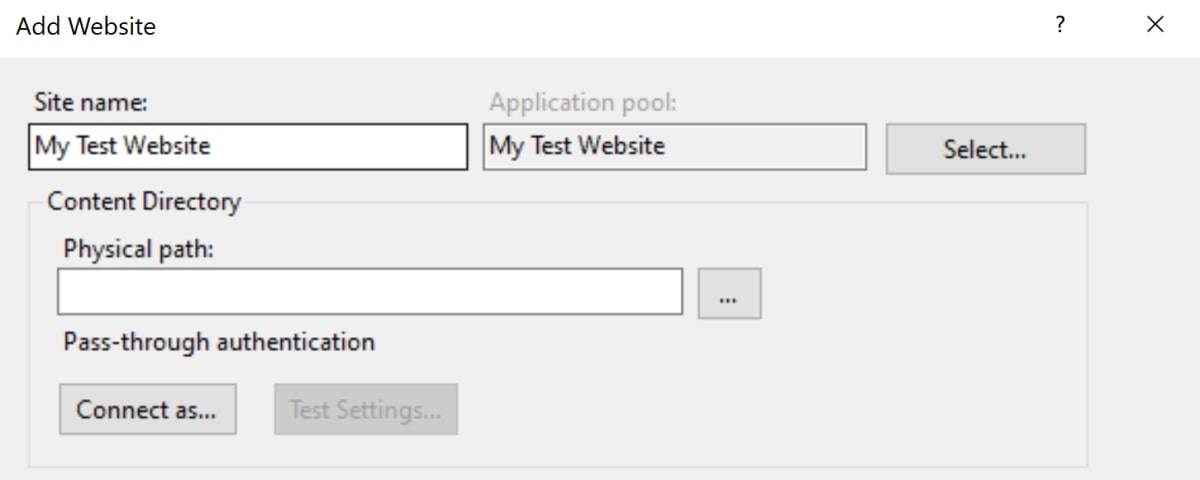
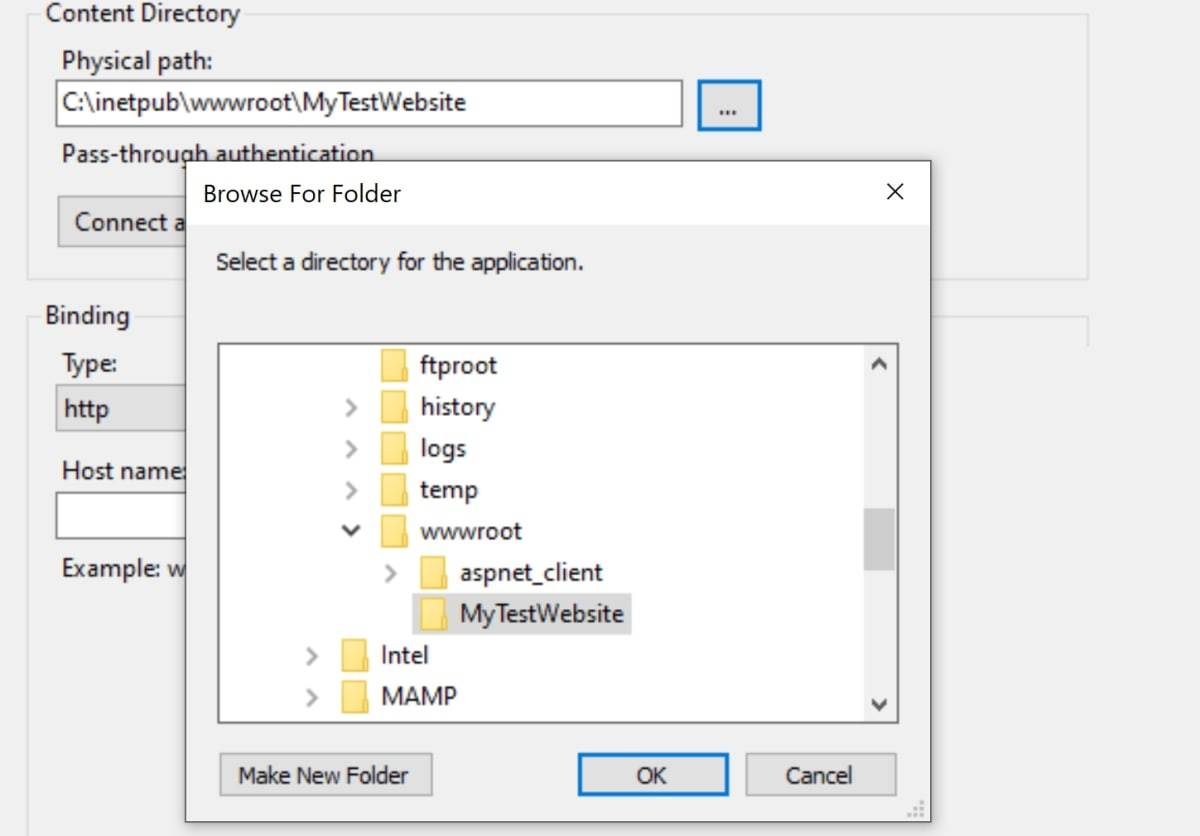
- To specify the location of your website files on the computer, add the physical path. Click on the three dots to select a folder and then navigate to the MyTestWebsite folder under the C:\inetpub\wwwroot directory from the menu.
- Please select "HTTP" as the type. The default port for HTTP is 80.

You can also configure a hostname, Write MyTestWebsites.
Select Start Website immediately, and click on OK.
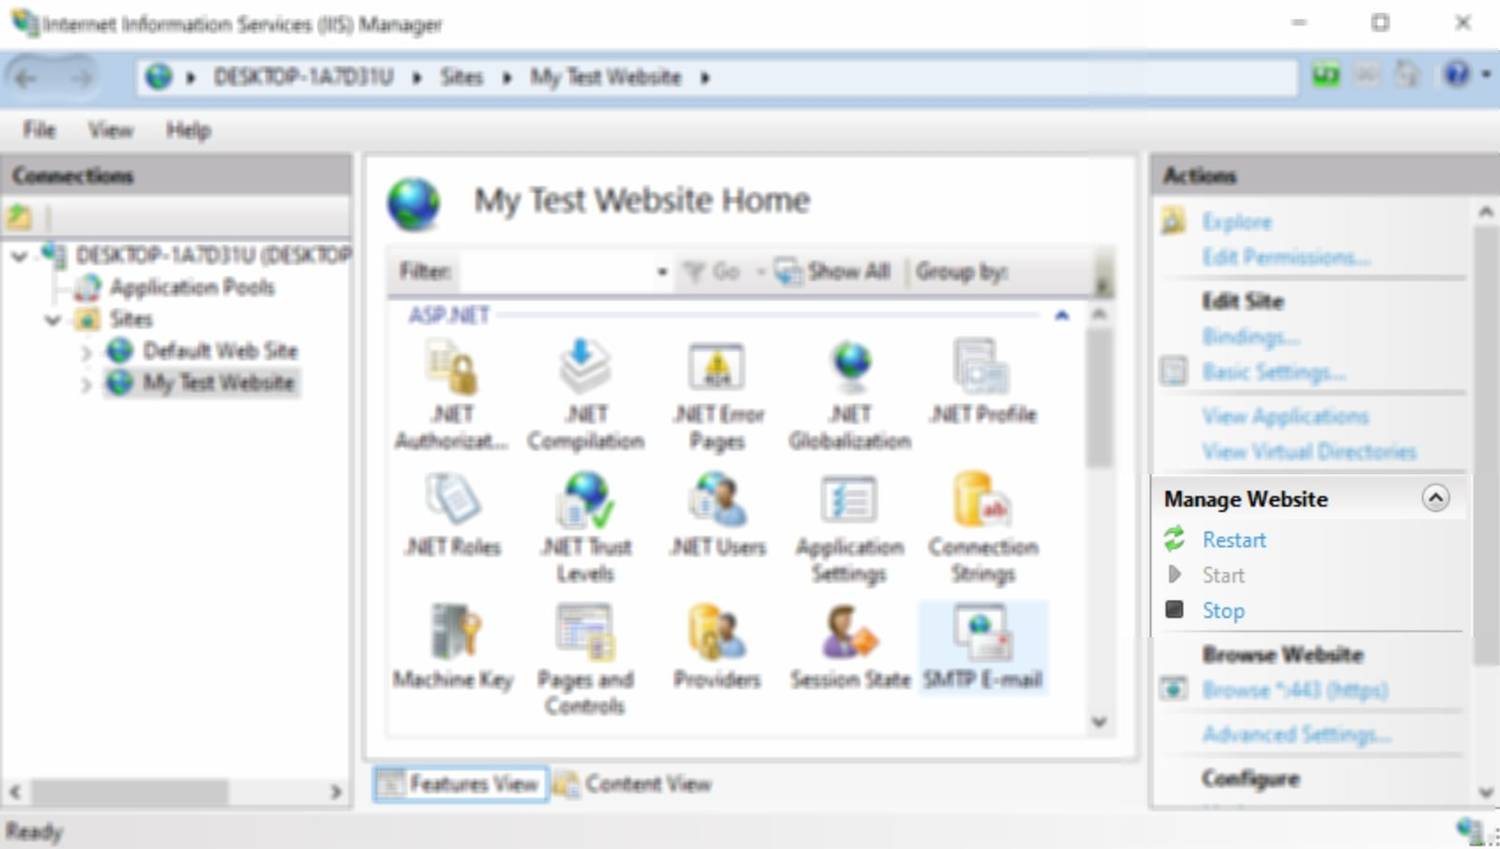
Highlight the new My Test Website directory in the left-hand column.

Your website cannot be accessed at the moment due to it having the same binding as Localhost port number 80.
To resolve the issue, navigate to the directory "C:\Windows\System32\drivers\etc" and locate the file named "hosts". Open the file as an administrator and add the following line at the bottom: "127.0.0.1 MyTestWebsite".

The process described involves giving a domain name to the address of the local host, which effectively establishes a local DNS on a Windows server. Consequently, when the browser tries to reach the domain name, it is redirected to the content that is being hosted locally.
Now, To start your web server and view your website, On the right side, in the middle, there is a button that says "Browse MyTestWebSite" on port 80.

You can also restart or stop the web server at any time.
Your website should now be running on the web server. You can access it via the URL https://localhost/.
To stop or restart the web server, click on Stop or Restart on the right-hand menu.
Hosting a Website Using IIS:
In the process of developing a website, it is crucial to perform local testing. One way to do this is by utilizing the Internet Information Services (IIS) web server to host the website locally. This method applies to both static websites (e.g. HTML or CSS sites) and dynamic websites (e.g. ASP.NET sites).
Click here if you wish to host ASP.NET on a server running IIS.
Happy Learning 😊😊
Thank you 🧡