


Introduction:
WordPress is one of the most popular Content Management Systems (CMS) written in PHP worldwide, powering millions of websites and blogs.
If you're planning to deploy a WordPress application on Amazon Web Services (AWS), you have several options, each with its own benefits and use cases. In this blog, we'll explore three different approaches for deploying WordPress applications on AWS: using EC2 instances, ECS (Elastic Container Service) with EFS (Elastic File System), and EKS (Elastic Kubernetes Service) with EFS.
Deploying WordPress on EC2 Instances:
You can deploy WordPress Applications with just one click using AWS-Lightsail. The traditional approach of deploying WordPress involves setting up virtual servers, known as Elastic Compute Cloud (EC2) instances, and configuring the environment manually.
Here's a step-by-step guide to deploying WordPress on EC2:
- Log in to the AWS Management Console.

- Navigate to EC2 (Elastic Compute Cloud) service.

- Click on "Launch Instance" to create a new EC2 instance.

- Name the server as WordPress Server.

- Choose an appropriate Amazon Machine Image (AMI) (e.g., Amazon Linux, Ubuntu, etc.). We are going with Ubuntu.
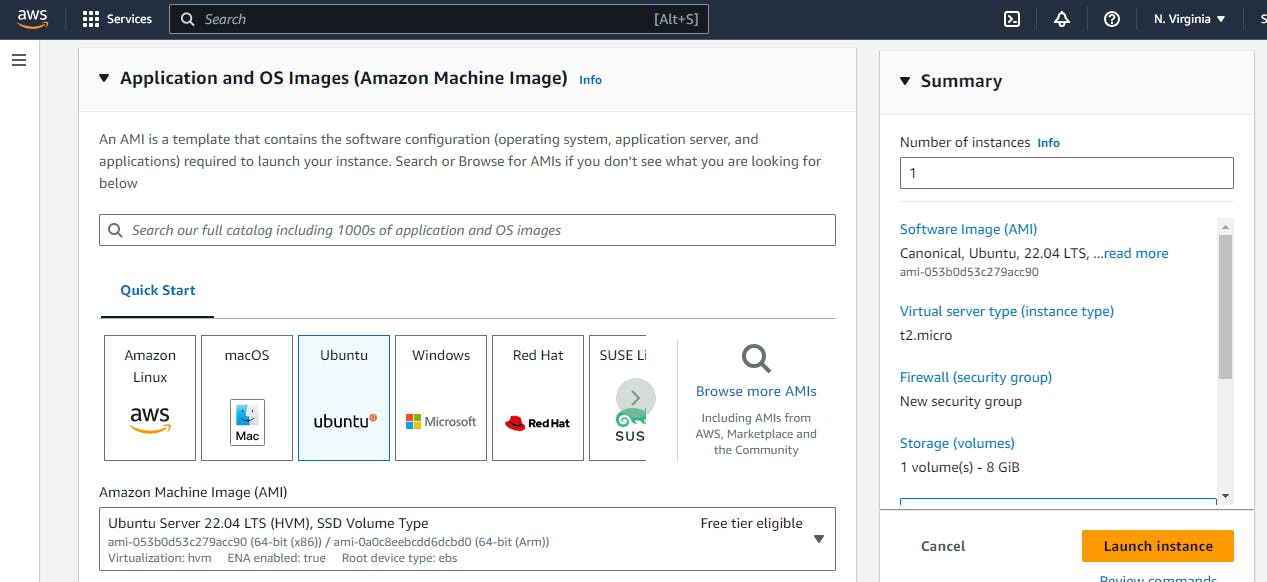
- Select an instance type based on your requirements. We are using t2.micro because it's free and Create a key pair to connect securely to your EC2 instance.

- In the networking section, leave everything as is and enable HTTP and HTTPS traffic by selecting the corresponding checkboxes. Finally, launch the instance.

Every time you reboot your instance, your public IP address will change. To ensure that your instance has a consistent public IP address, you can allocate an Elastic IP in AWS. The following steps will guide you through assigning a static IP address to your instance:
To access the Elastic IP feature, please navigate to the EC2 dashboard and click on the "Elastic IPs" option.

- Allocate an Elastic IP address by clicking on the corresponding option.

- Please scroll down and choose the Allocate button

- To associate an Elastic IP address, first, obtain the Elastic IP and select the appropriate checkbox. Then, click on Action and choose Associate Elastic IP address.

- Please select the previously created instance from the list and click on the Allocate button to proceed.

- On the left-hand side, you will see the instance navbar. Click on instances and you will be directed to the dashboard of your instance. Select the instance checkbox and then click on the connect button which is on the top.

- Here are multiple ways to connect to an EC2 instance using PEM and PPK files, but we will connect directly by clicking on the Connect button.

- Welcome to the Ubuntu terminal. You can now configure your WordPress application.

Install LAMP stack(Linux, Apache, MySQL, PHP)
Execute the following commands in Ubuntu terminals to install the necessary prerequisites.
Update the package list:
sudo apt updateInstall Apache web server:
sudo apt install apache2Install MySQL database server:
sudo apt install mysql-serverInstall PHP:
sudo apt install php libapache2-mod-php php-mysqlRestart Apache for changes to take effect:
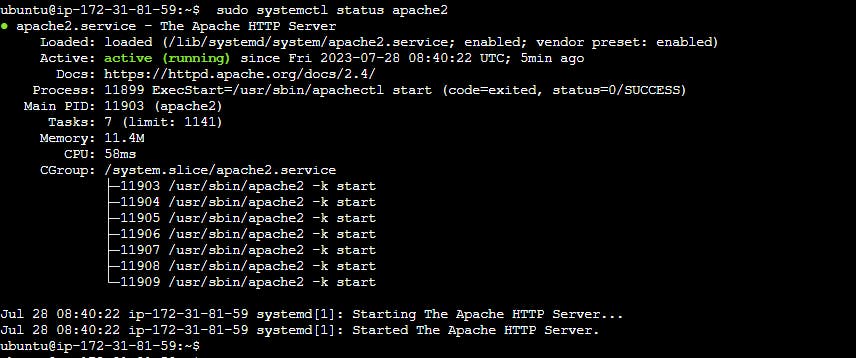
sudo systemctl restart apache2Check the status of the Apache server:
sudo systemctl status apache2
- To verify if the Apache server is hosting or not, you can simply copy the public IP address of the instance, paste it into your browser's address bar, and hit enter.

Now we have installed all the dependencies of applications.
Before going to the next step just one small configuration that we need to do on our MySQL server
Basically, we have to change the basic MySQL authentication plugins to MySQL native password so that we can log in to the MySQL server with a normal password, which is required in order to install WordPress.
To finish the task, kindly follow the steps in the terminal.
Login to MySQL server:
sudo mysql -u rootAt the MySQL prompt, write a query to change the password of the root user:
AlTER USER 'root'@localhostIDENTIFIED WITH mysql_native_password BY 'TestPassword@123';
Make sure to avoid using easily guessable passwords. The password used here is only for demonstration purposes.
Create a user other than the root in order to use our WordPress:
CREATE USER 'wp_user'@localhostIDENTIFIED BY 'TestPassword@123';Create a database for WordPress:
CREATE DATABASE wp;Grant all privileges on the database 'wp' to the newly created user:
GRANT ALL PRIVILEGES ON wp.* TO 'wp_user'@localhost;

Press Ctrl+d to go back to the command prompt. Now We have configured the MySQL server.
Go to the temp folder:
cd /tmp/Paste the URL that downloads WordPress:
wgethttps://wordpress.org/latest.tar.gz

Unzip:
tar -xvf latest.tar.gzYou will now see a new folder named wordpress:
ls

Move wordpress folder to Apache document root:
sudo mv wordpress/ /var/www/htmlGo to Apache document root:
cd /var/www/html && ls

- Now Copy the public IP address of the Instance and paste it into your browser's address bar followed by the subpath of the wordpress folder.: Public_IP/wordpress and hit enter.

This is the WordPress installation screen, from this, we can install WordPress by clicking Let's go!
- Configure the database which we have created before as shown below snapshot and keep the database name and table prefix as it is and hit submit button

- You will get an error shown below

To resolve this error, you can create a wp-config.php file and paste the configuration rules into it. This file should be located in the wordpress directory as shown in the snapshot above.

To save and exit, use the keyboard shortcut Ctrl+S to save and Ctrl+X to exit.
To continue with the installation, kindly return to the browser and select the run the installation button.
- This is the welcome page for WordPress. Please configure all settings to your preference. You can customize it later according to your needs.


Hit the Install WordPress button.
- Now your WordPress is installed

click on the login button.
This is our admin login page click on the Login button.
path:
public_ip/wordpress/wp-login.php

- Customize your website according to your preferences here.

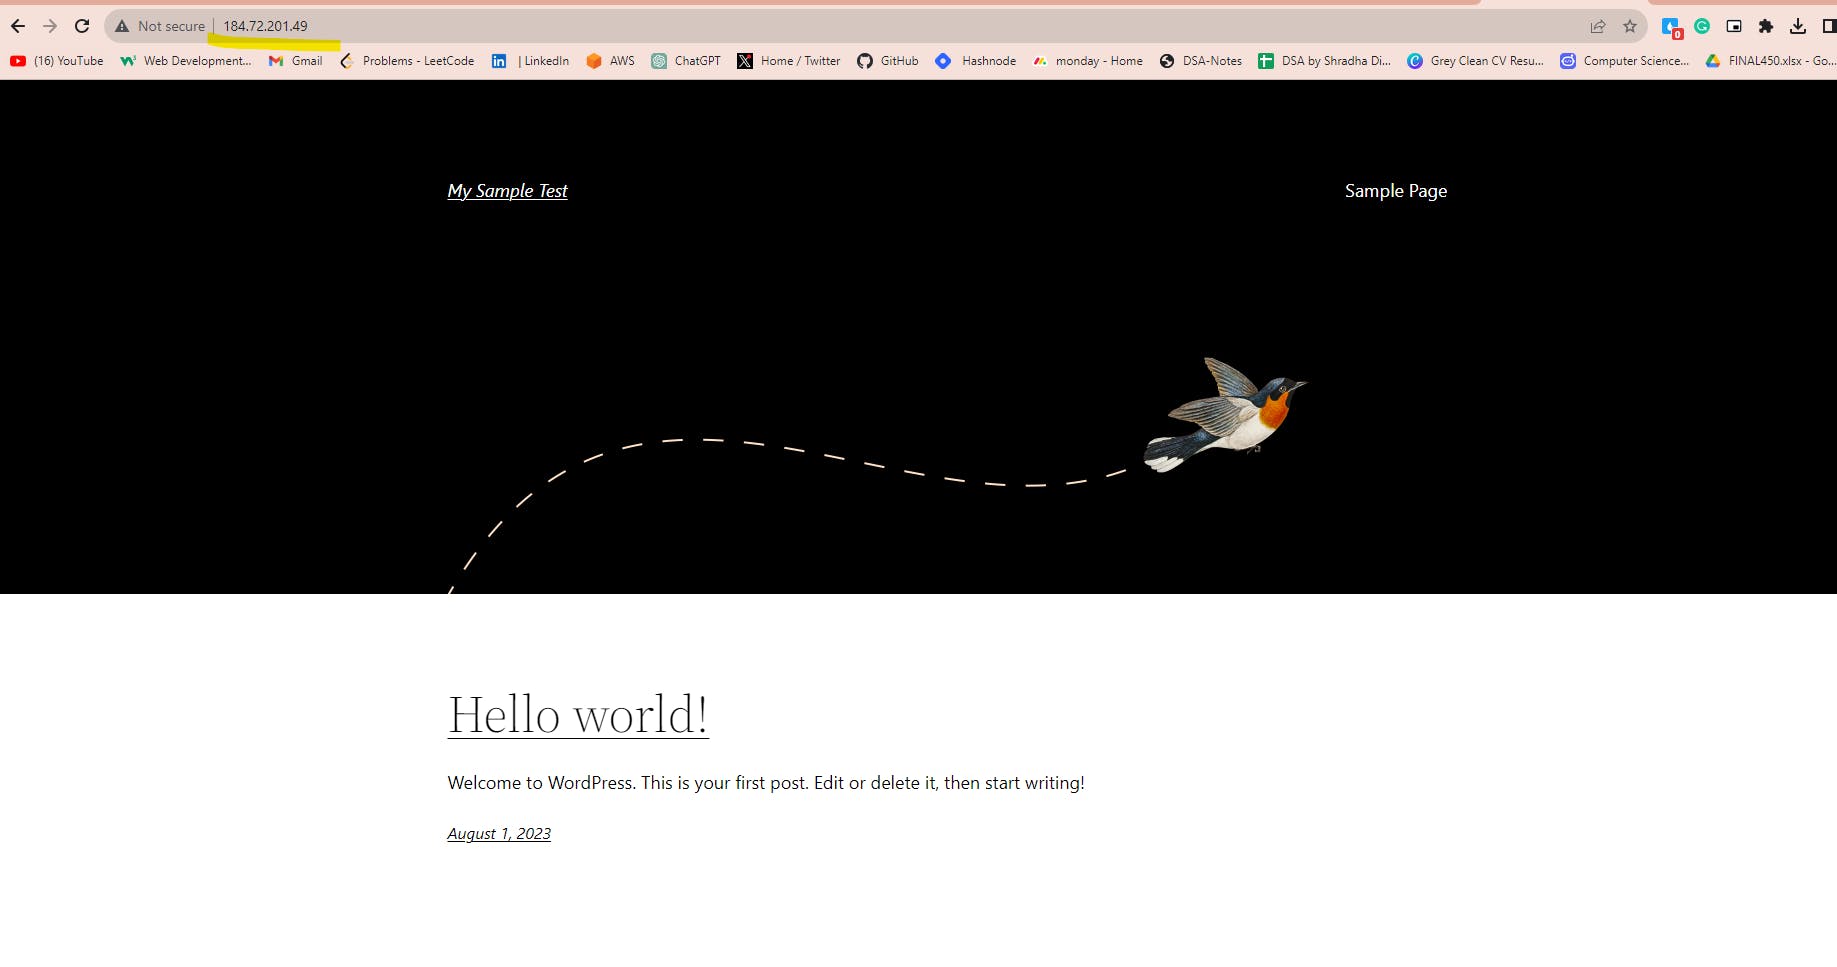
This is the website where I configured
the path:
public_ip/wordpress/

- This is my customization with a new Theme.

The current configuration of the Apache website allows access through the public address, whereas the WordPress website requires a subpath to be added in the browser.
It would be great if we set the WordPress website as the default page.
To do this follow the steps below
Go to the path:
cd /etc/apache2/sites-available/ && lsEdit the file:
sudo nano 000-default.confAdd subpath on DocumentRoot:
/var/www/html/wordpress

Save it.
Restart Apache for changes to take effect:
sudo systemctl restart apache2Paste the public IP on the browser and hit enter
Now we are done with the EC2 part.
You can link your website to a DNS (Domain Name System) and assign an elastic IP address to your EC2 instance, which eliminates the need to change it every time it boots.
Coming soon - stay tuned! :- Deploy WordPress applications on Amazon EC2 instances using Docker. Alternatively, deploy WordPress on ECS with EFS using Fargate. and deploy WordPress on EKS with EFS.
Thanks for reading 🧡 and Stay tuned for more content.
Happy Learning 😊😊